Installing Lifeproof Vinyl Flooring In Bathroom: Essential Considerations
Installing Lifeproof vinyl flooring in a bathroom can significantly enhance its aesthetic appeal and functionality. However, to achieve a successful installation, it is crucial to adhere to specific guidelines and considerations. This article provides a comprehensive overview of the essential aspects of installing Lifeproof vinyl flooring in a bathroom, ensuring a durable and visually stunning floor:
1. Preparation and Planning
Prior to installation, meticulous preparation and planning are paramount. Ensure the subfloor is level, dry, and free from any imperfections. Remove any existing flooring or adhesive residue. Determine the floor plan, allowing for expansion gaps around the perimeter and at any transitions.
2. Choosing the Right Underlayment
The underlayment serves as a crucial layer beneath the vinyl flooring. It provides cushioning, sound insulation, and moisture protection. For bathrooms, it is recommended to use a waterproof underlayment designed specifically for vinyl flooring.
3. Acclimation
Before installing the vinyl flooring, it must be acclimated to the bathroom's temperature and humidity levels. This typically involves storing the flooring unopened in the room for 24-48 hours. Proper acclimation prevents buckling or warping after installation.
4. Dry-Fit and Layout
Prior to adhering the flooring, perform a dry-fit to ensure it aligns correctly. This involves laying out the planks without adhesive to confirm the layout, identify any necessary cuts, and check for any potential issues.
5. Adhesive Application and Installation
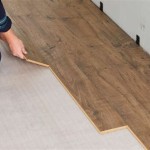
When applying the adhesive, follow the manufacturer's instructions carefully. Use a notched trowel to spread the adhesive evenly over the subfloor. Starting from a corner, carefully place each plank into the adhesive and press down firmly. Ensure the planks are flush with one another and align the edges precisely.
6. Trimming and Transitions
Using a utility knife or flooring cutter, trim the planks along the edges and around obstacles such as toilets or sinks. For a seamless transition to other flooring types, use appropriate transition strips or molding.
7. Cleaning and Maintenance
After installation, clean the floor thoroughly with a damp mop and a pH-neutral cleaner. Regular cleaning and maintenance, such as sweeping, vacuuming, and occasionally mopping with a vinyl floor cleaner, will preserve the floor's appearance and extend its lifespan.
By adhering to these essential considerations, you can achieve a professional-looking, waterproof, and durable Lifeproof vinyl floor in your bathroom. Enjoy a flooring solution that combines style and functionality for years to come.

Installing Vinyl Plank Flooring Lifeproof Waterproof Rigid Core Sustain My Craft Habit

Lifeproof Vinyl Floor Installation Perfect For Kitchens Bathrooms

Lifeproof Vinyl Floor Installation Perfect For Kitchens Bathrooms

How To Install Vinyl Plank Flooring In A Bathroom Fixthisbuildthat

Installing Vinyl Plank Flooring Lifeproof Waterproof Rigid Core Sustain My Craft Habit

How To Install Vinyl Plank Flooring In A Bathroom

Why We Chose Lifeproof Vinyl Flooring And How To Install It

Why We Chose Lifeproof Vinyl Flooring And How To Install It

How To Install Vinyl Plank Floors In A Bathroom Over Tile

Lifeproof Vinyl Floor Installation Perfect For Kitchens Bathrooms
Related Posts


