Here's an article about hanging vinyl flooring on walls:
How To Hang Vinyl Flooring On Walls
Vinyl flooring, traditionally used as a durable and water-resistant surface underfoot, is increasingly finding its way onto walls as a visually appealing and practical design element. This application offers a unique aesthetic, adding texture, color, and a resilient surface to any room. The process, while not overly complex, requires careful preparation, the right materials, and a methodical approach to ensure a long-lasting and professional-looking installation.
Before embarking on this project, it's crucial to understand the considerations involved and the steps required for successful adherence. These considerations range from selecting the appropriate type of vinyl flooring to preparing the wall surface and choosing the best adhesive. Overlooking these preliminary steps can compromise the finish and longevity of the installation.
Selecting the Right Vinyl Flooring
Not all vinyl flooring is created equal, and the type chosen will significantly impact the ease of installation and the final appearance. Sheet vinyl and vinyl planks are the most common options for wall applications, each with its distinct advantages and disadvantages.
Sheet vinyl, available in large rolls, offers a seamless look, which can be particularly desirable for creating a uniform and uncluttered design. The primary challenge with sheet vinyl is its size and weight, making it more difficult to handle and position accurately, especially for single-person installations. Furthermore, working with sheet vinyl requires precise cutting to ensure a perfect fit, as any errors will be readily visible given its continuous nature.
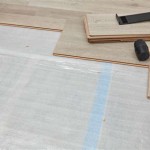
Vinyl planks, on the other hand, come in individual pieces, making them easier to manage and install. This modularity allows for more design flexibility, including the creation of patterns and the ability to mix and match different colors or textures. While plank vinyl can be more forgiving in terms of installation errors due to its individual nature, it does require more cuts overall and a more meticulous approach to ensure consistent spacing and alignment.
When choosing between sheet vinyl and plank vinyl, consider the size and complexity of the wall, the desired aesthetic, and your comfort level with cutting and handling large, unwieldy materials. Gauge the thickness of the vinyl too. Thicker vinyl will be more rigid and may be more challenging to bend around corners or irregular surfaces. A good balance between durability and flexibility is ideal for wall applications.
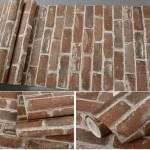
Beyond the type of vinyl, also consider the texture and finish. Textured vinyl can add depth and visual interest to the wall, while a smoother finish might be easier to clean and maintain. Sample different options and visualize how they will look on the wall under various lighting conditions before making a final decision.
Preparing the Wall Surface
Proper wall preparation is arguably the most crucial step in hanging vinyl flooring. The adhesive used to secure the vinyl relies on a strong bond with the underlying surface, and any imperfections or contaminants will weaken this bond, leading to potential failures such as peeling or bubbling.
First, thoroughly clean the wall to remove any dirt, dust, grease, or loose paint. A simple solution of warm water and detergent is usually sufficient. For stubborn stains or grease, a stronger degreaser may be necessary. Rinse the wall thoroughly with clean water and allow it to dry completely before proceeding.
Next, inspect the wall for any imperfections, such as cracks, holes, or uneven surfaces. Fill any cracks or holes with spackle or drywall compound and sand them smooth once dry. If the wall is significantly uneven, consider applying a skim coat of drywall compound to create a smooth and uniform surface.
Priming the wall is another essential step. Primer serves several purposes: it seals the surface, creating a more consistent substrate for the adhesive; it improves the adhesion of the adhesive to the wall; and it can help prevent moisture from penetrating the wall, which can damage the vinyl flooring and the wall itself. Use a high-quality primer specifically designed for use with adhesives, and apply it according to the manufacturer's instructions.
If the wall is painted with a glossy or semi-gloss paint, sanding it down to a matte finish before priming is recommended. Glossy surfaces can be difficult for adhesives to grip, so creating a rougher surface will improve adhesion. Use a medium-grit sandpaper for this purpose, and be sure to remove all sanding dust before priming.
Take extra care with walls in bathrooms or other areas with high humidity. In these environments, consider applying a moisture barrier to the wall before priming to prevent moisture problems. A plastic sheet or a liquid-applied moisture barrier can be used for this purpose.
Adhesive Selection and Application
Choosing the right adhesive is paramount to achieving a secure and lasting bond between the vinyl flooring and the wall. Not all adhesives are suitable for this application, and using the wrong one can lead to failure. Specifically, look for adhesives that are designed for use with vinyl and that are recommended for vertical surfaces.
Construction adhesives, also known as multi-purpose adhesives, are a common choice for hanging vinyl flooring. These adhesives provide a strong and durable bond and are readily available at most hardware stores. Look for a construction adhesive that is specifically formulated for use with vinyl and that is compatible with the wall surface.
Vinyl flooring adhesives, specifically designed for installing vinyl flooring on floors, are also an option for wall applications. These adhesives typically offer excellent adhesion and water resistance, making them suitable for bathrooms and other wet areas. However, ensure that the adhesive is formulated for vertical applications, as some flooring adhesives are designed only for horizontal surfaces.
When applying the adhesive, follow the manufacturer's instructions carefully. Typically, a notched trowel is used to apply the adhesive evenly to the wall. The size of the notch will depend on the type of adhesive and the thickness of the vinyl flooring. Refer to the adhesive packaging for specific recommendations.
Apply the adhesive in small sections, working from the top down. This will prevent the adhesive from drying out before the vinyl flooring can be applied. Press the vinyl flooring firmly against the wall, ensuring that it is properly aligned and that there are no air pockets. Use a rubber roller or a wallpaper smoothing tool to press the vinyl firmly against the adhesive and to ensure a strong bond. Work out any air bubbles as you go.
For sheet vinyl, it's recommended to have at least two people during the installation process, one to hold the sheet vinyl in place and the other to apply the adhesive and smooth the vinyl onto the wall. Carefully align the sheet vinyl with the desired position on the wall and work from the center outwards to avoid trapping air bubbles.
For plank vinyl, start at the bottom and work upwards, ensuring that each plank is aligned properly with the adjacent planks. Use spacers to maintain consistent spacing between the planks, if desired. After each row is installed, use a level to ensure that it's straight before the adhesive sets completely.
Clean any excess adhesive from the surface of the vinyl flooring with a damp cloth or sponge. Some adhesives may require a specific solvent for cleanup, so refer to the manufacturer's instructions. Allow the adhesive to dry completely before applying any trim or molding.
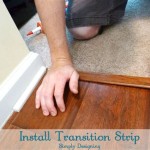
After the adhesive has dried, inspect the installation for any gaps or imperfections. Use a small amount of adhesive to fill any gaps or to secure any loose edges. Apply trim or molding to cover the edges of the vinyl flooring and to provide a finished look. Caulk any seams or gaps between the trim and the wall to prevent moisture penetration.
Appropriate ventilation during and after the adhesive application is essential. This allows the adhesive to cure properly and minimizes the emission of volatile organic compounds (VOCs). Open windows and doors or use a fan to circulate air throughout the room.
Hanging vinyl flooring on walls is a rewarding project that can transform the look of a room. By carefully selecting the right vinyl flooring, preparing the wall surface properly, and using the appropriate adhesive, a durable and visually appealing wall covering can be achieved.

How To Install Vinyl Plank Flooring On Walls Europine

How To Install Vinyl Plank Flooring On Wall Step By Tutorial Walls Wood Planks

Wall Cladding With Flooring Material 2024 09 23 Floor Trends Installation

How To Install Waterproof Vinyl Plank Flooring Four Generations One Roof

Vinyl Plank Installation Tips For Doorways Halls Walls And Closets

How To Make A Laminate Flooring Accent Wall

How To Cover A Wall In Vinyl Records Damage Free Blue I Style

System For The Installation Of Vinyl Sheet On Walls In Wet Areas R08 Mapei

How To Install Sheet Vinyl Flooring

How To Install Vinyl Flooring With S Wikihow
Related Posts