Removing Vinyl Flooring From Ceramic Tile: A Comprehensive Guide
The decision to install vinyl flooring over existing ceramic tile is often driven by aesthetic preferences, budget constraints, or the perceived simplicity of the installation process. However, the removal of this vinyl layer can be a significantly more complex undertaking than its initial placement. Successfully removing vinyl flooring without damaging the underlying ceramic tile requires careful planning, the right tools, and a systematic approach. This article provides a detailed guide to safely removing vinyl flooring adhered to ceramic tile.
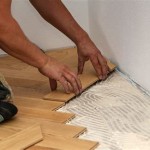
Understanding the nature of the adhesive used to bond the vinyl to the ceramic tile is crucial. Adhesives vary widely in their composition and bonding strength. Some adhesives are relatively pliable and can be softened with heat or specialized solvents. Others are more aggressive and require mechanical methods for removal. The type of vinyl flooring itself also plays a role. Sheet vinyl, for instance, tends to be more challenging to remove than individual vinyl tiles or planks due to its larger surface area and continuous adhesive bond.
Proper preparation of the work area is essential for a safe and efficient removal process. This includes protecting adjacent surfaces, ensuring adequate ventilation, and wearing appropriate personal protective equipment (PPE). Neglecting these precautions can lead to damage to surrounding areas, exposure to harmful chemicals, and potential injury.
Key Point 1: Preparation and Safety Measures
Before commencing any removal work, thorough preparation of the space is necessary. Remove all movable furniture and objects from the room. Cover any remaining furniture with plastic sheeting to protect it from dust and debris. Protect adjacent flooring, such as hardwood or carpeting, with drop cloths or painter's tape. This will prevent accidental damage from tools or adhesive residue.
Ventilation is of paramount importance, especially when using solvents or heat. Open windows and doors to ensure a constant flow of fresh air. A fan can also be used to improve air circulation. This is particularly crucial when dealing with older adhesives that may contain volatile organic compounds (VOCs).
Personal protective equipment (PPE) is mandatory for safeguarding against potential hazards. Safety glasses are essential to protect the eyes from flying debris and chemical splashes. Gloves, preferably chemical-resistant, should be worn to prevent skin irritation from adhesives and solvents. A dust mask or respirator is recommended to avoid inhaling dust particles or solvent fumes. Knee pads will provide added comfort and protection when working on the floor for extended periods. Consider wearing old clothing that can be easily washed or discarded after the project.
A thorough inspection of the vinyl flooring should be conducted to identify any potential hazards, such as loose nails, staples, or sharp edges. Any such hazards should be addressed before proceeding with the removal process. This is to avoid accidental cuts or punctures during the removal process.
Key Point 2: Methods for Removing Vinyl Flooring
Several methods can be employed to remove vinyl flooring adhered to ceramic tile. The choice of method depends on the type of vinyl, the strength of the adhesive, and the desired outcome (i.e., preserving the underlying ceramic tile in pristine condition). The following are some of the most common and effective techniques:
Manual Scraping: This method involves using a floor scraper or putty knife to manually lift and remove the vinyl flooring. It is best suited for situations where the adhesive bond is relatively weak or the vinyl is already peeling in places. Start by attempting to lift a corner of the vinyl flooring. If it comes up easily, continue scraping along the edges, working your way inward. A heat gun may be used in conjunction with scraping to soften the adhesive for easier removal. However, caution is advised when using a heat gun, as excessive heat can damage the ceramic tile.
Heat Gun Application: Applying heat with a heat gun can soften the adhesive, making it easier to scrape away the vinyl. Hold the heat gun a few inches away from the vinyl surface and move it slowly and evenly back and forth. Avoid concentrating the heat in one spot for too long, as this can damage the vinyl or the underlying ceramic tile. Once the adhesive is softened, use a floor scraper or putty knife to lift the vinyl. This method is particularly effective for removing sheet vinyl or vinyl tiles that are firmly bonded to the ceramic tile.
Solvent Application: Chemical solvents can be used to dissolve or weaken the adhesive bond. Several commercially available adhesive removers are specifically designed for vinyl flooring. These solvents typically contain chemicals such as mineral spirits, acetone, or citrus-based degreasers. Always follow the manufacturer's instructions carefully when using chemical solvents. Apply the solvent to a small area of the vinyl flooring and allow it to sit for the recommended amount of time. Then, use a floor scraper or putty knife to lift the vinyl. Ensure adequate ventilation when using solvents, and wear appropriate PPE, including gloves and a respirator.
Steam Application: Applying steam can also help to loosen the adhesive bond. A steam cleaner can be used to direct steam onto the vinyl flooring. The heat and moisture from the steam will penetrate the vinyl and soften the adhesive. After steaming, use a floor scraper or putty knife to lift the vinyl. This method is generally considered to be less aggressive than using solvents or a heat gun, and it is often preferred when trying to minimize the risk of damage to the ceramic tile.
Mechanical Removal: For stubborn cases where manual scraping, heat, solvents, and steam are ineffective, a mechanical floor scraper may be necessary. These tools use a motorized blade to forcefully remove the vinyl flooring. Exercise extreme caution when using a mechanical floor scraper, as it can easily damage the ceramic tile if not used properly. Start with a low setting and gradually increase the power as needed. Keep the blade flat against the floor to avoid gouging the ceramic tile.
Key Point 3: Removing Adhesive Residue and Cleaning
Once the vinyl flooring has been removed, adhesive residue will inevitably remain on the surface of the ceramic tile. Removing this residue is crucial for preparing the tile for re-installation of new flooring or for restoring its original appearance. Several methods can be used to remove adhesive residue, depending on the type of adhesive and the extent of the residue.
Solvent Application: The same solvents used to remove the vinyl flooring can also be used to remove adhesive residue. Apply the solvent to the affected areas and allow it to sit for the recommended amount of time. Then, use a scraper or scrub brush to remove the softened residue. Wipe the tile clean with a damp cloth. Repeat as necessary until all the residue is removed.
Scraping: A putty knife or scraper can be used to manually scrape away adhesive residue. This method is most effective for removing small patches of residue or residue that has already been softened by a solvent. Hold the scraper at a low angle to avoid scratching the ceramic tile. Work slowly and carefully to avoid damaging the grout lines.
Commercial Adhesive Removers: Numerous commercial adhesive removers are specifically designed for removing adhesive residue from ceramic tile. These products typically contain a blend of solvents and detergents that effectively dissolve and lift the residue. Follow the manufacturer's instructions carefully when using these products. Apply the remover to the affected areas and allow it to sit for the recommended amount of time. Then, use a scraper or scrub brush to remove the softened residue. Wipe the tile clean with a damp cloth.
Household Cleaners: In some cases, household cleaners such as vinegar, baking soda, or dish soap can be effective for removing adhesive residue. Vinegar can be used to dissolve water-based adhesives. Baking soda can be used to create a paste that gently scrubs away residue. Dish soap can be used to remove oily or greasy residue. Always test these cleaners in an inconspicuous area first to ensure they do not damage the ceramic tile.
Grout Cleaning: After removing the adhesive residue from the tile surface, it is important to clean the grout lines. Grout lines can often trap adhesive residue and dirt, which can make them appear discolored. Use a grout brush and a grout cleaner to scrub the grout lines. Rinse thoroughly with water.
Following the cleaning process, inspect the ceramic tile for any damage. If any tiles are cracked or broken, they should be replaced. If any grout is missing or damaged, it should be repaired. Once the ceramic tile has been thoroughly cleaned and repaired, it is ready for re-installation of new flooring or for restoration to its original condition.

How To Remove Vinyl Flooring

Diy How To Remove Vinyl Flooring Bosch Multi Tool

The Easiest Way To Remove Vinyl Floor Tiles

How To Remove Vinyl Flooring The Home Depot

After Removing Old Vinyl Tiles From A Bathroom Floor Can New Be Installed Without Putting In Some Kind Of Subfloor Why Or Not Quora

How To Remove L And Stick Floor Tile A Erfly House

How To Remove Old Vinyl Or Linoleum Flooring Kitchens And Bathrooms

Tearing Out Old Kitchen Flooring Planitdiy

Removing Vinyl Flooring Homeadvisor

How To Remove Self Adhesive Vinyl Floor Planks L And Stick Pvc Tiles
Related Posts