How to Install Laminate Flooring Over Uneven Surfaces
Laminate flooring is a popular choice for homeowners due to its durability, affordability, and ease of installation. However, one common challenge that arises during installation is dealing with uneven subfloors. A perfectly level subfloor is ideal, but often existing floors have dips, humps, or other imperfections that can compromise the integrity and appearance of the finished laminate floor. Installing laminate over an uneven surface without proper preparation can lead to issues such as buckling, gapping, squeaking, and premature wear.
This article details the steps involved in preparing an uneven subfloor for laminate flooring installation, ensuring a professional and long-lasting result. Understanding the causes and consequences of an uneven subfloor is crucial before beginning any installation project.
The success of any laminate flooring project hinges on the quality of the subfloor preparation. Addressing unevenness beforehand is not simply an aesthetic concern; it’s a structural necessity. A level and stable subfloor provides the necessary support for the laminate planks, preventing them from flexing or shifting underfoot. This ensures even weight distribution and minimizes stress on the interlocking edges, thereby extending the lifespan of the flooring.
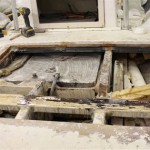
An uneven subfloor can manifest in various forms. It might be a gradual slope across the entire room, localized dips caused by previous damage, or humps resulting from settling or improper construction. Regardless of the specific issue, the underlying principle remains the same: the deviation from a flat plane must be rectified before installing the laminate flooring.
Assessing the Subfloor's Unevenness
The first step in installing laminate flooring over an uneven surface is to accurately assess the extent of the problem. This involves a thorough inspection using appropriate tools and techniques. Visual inspection alone is insufficient; precise measurements are necessary to determine the degree of unevenness and identify the best course of action.
One of the most effective tools for this task is a long, straight edge – ideally a 6-foot level or a long metal ruler. Place the straight edge on the subfloor in various locations and orientations. Use a feeler gauge to measure any gaps between the straight edge and the subfloor surface. Record the size and location of any dips or humps that are identified. Repeat this process systematically across the entire area to be covered with laminate flooring.
For larger areas or more complex unevenness, a self-leveling laser level can provide a more comprehensive assessment. This tool projects a perfectly level laser line across the room, allowing for a visual comparison of the subfloor's deviations. Measure the distance between the laser line and the subfloor at multiple points to create a detailed contour map of the surface.
In addition to measuring the height variations, it is also important to inspect the subfloor for structural issues. Look for signs of rot, water damage, or loose boards. These problems must be addressed before any leveling work begins. Replace any damaged sections of the subfloor to ensure a solid and stable foundation for the laminate flooring.
Documenting the findings of the subfloor assessment is crucial. Create a sketch of the room, noting the location and size of all uneven areas. This will serve as a guide during the leveling process and help to accurately estimate the materials needed.
Methods for Leveling an Uneven Subfloor
Once the subfloor has been thoroughly assessed, the next step is to choose the appropriate method for leveling it. Several options are available, each with its own advantages and disadvantages. The best choice will depend on the severity of the unevenness, the type of subfloor, and the desired outcome.
For minor imperfections and gradual slopes (less than ¼ inch over a 6-foot span), a thicker underlayment can often be sufficient. Underlayment is a layer of material placed between the subfloor and the laminate flooring. It provides cushioning, sound insulation, and, in some cases, can help to smooth out minor unevenness. However, using an excessively thick underlayment to compensate for significant unevenness is generally not recommended, as it can compromise the stability of the laminate flooring.
Self-leveling compound is a pourable mixture that spreads out and hardens into a smooth, level surface. It is ideal for filling in larger dips and creating a uniform plane across the entire floor. Self-leveling compound is suitable for concrete subfloors and can also be used on wood subfloors after applying a primer and ensuring proper adhesion. Follow the manufacturer's instructions carefully regarding mixing ratios, application thickness, and drying time.
For localized humps or high spots, grinding or sanding may be necessary. This involves using a concrete grinder or a floor sander to remove the excess material and create a smoother transition. Wear appropriate safety gear, including a dust mask and eye protection, when using these tools. Grinding is typically used on concrete subfloors, while sanding is more common on wood subfloors.
Another option for leveling an uneven subfloor is to use shims. Shims are thin, tapered pieces of wood or plastic that can be inserted underneath low spots to raise them to the desired level. This method is particularly useful for addressing localized dips or correcting unevenness around the perimeter of the room. Shims should be securely fastened to the subfloor to prevent them from shifting over time.
In cases of extreme unevenness, where the floor is significantly sloped or has large dips or humps, it may be necessary to install a new subfloor. This involves removing the existing subfloor and replacing it with a new one that is level and structurally sound. This is the most labor-intensive and expensive option, but it provides the best guarantee of a perfectly level base for the laminate flooring.
Installing Laminate Flooring on the Prepared Subfloor
After the subfloor has been properly leveled, the final step is to install the laminate flooring. This process is generally straightforward, but it is important to follow the manufacturer's instructions carefully to ensure a professional and long-lasting result. Before beginning, acclimatize the laminate planks to the room's temperature and humidity for at least 48 hours. This will allow the planks to expand or contract slightly, preventing issues such as buckling or gapping after installation.
Begin by installing the underlayment. This provides cushioning and sound insulation, and it can also help to smooth out any minor imperfections that remain in the subfloor. Overlap the seams of the underlayment and tape them together to prevent moisture from seeping through. Ensure the underlayment is properly secured and smooth to avoid transferring any unevenness to the laminate.
When starting the installation, leave an expansion gap of approximately ¼ inch around the perimeter of the room. This allows the laminate flooring to expand and contract with changes in temperature and humidity without putting pressure on the walls. Use spacers to maintain the proper expansion gap throughout the installation process.
Install the first row of laminate planks along a straight edge, such as a wall or a chalk line. Use a tapping block and a hammer to gently tap the planks together, ensuring a tight and secure fit. Be careful not to damage the interlocking edges of the planks during this process. Subsequent rows are installed in a similar manner, staggering the seams to create a more visually appealing and structurally sound floor.
When installing around pipes or other obstacles, use a jigsaw to cut the planks to the appropriate shape. Measure accurately and cut carefully to avoid gaps or overlaps. Fill any gaps around pipes with a flexible sealant to prevent moisture from entering underneath the flooring.
Once the laminate flooring has been installed, remove the spacers and install baseboards or quarter-round molding to cover the expansion gap around the perimeter of the room. This will provide a clean and finished look, and it will also help to protect the edges of the laminate flooring from damage.
After the installation is complete, inspect the floor carefully for any signs of unevenness, gapping, or other problems. If any issues are identified, address them promptly to prevent them from becoming more serious over time. Regular cleaning and maintenance will help to keep the laminate flooring looking its best for many years to come.
By following these steps, homeowners can successfully install laminate flooring over uneven surfaces, achieving a beautiful and durable floor that will enhance the value and appeal of their homes. Proper preparation and attention to detail are essential for ensuring a professional and long-lasting result.

Diy Vinyl Plank On Uneven Floors

How To Install Laminate Flooring On An Uneven Surface Working

How To Transition Between Uneven Laminate Floors

Common Mistakes When Laying Laminate Flooring Next Day Floors

How To Lay Laminate Flooring Over An Uneven Floor Hunker

Modifying Laminate Transitions To Fit

Laying Laminate On Uneven Flooring How To Fix Your Subfloor Mersey

How To Install Laminate Flooring On An Uneven Surface Working

3 Options For Uneven Floor Repair Doityourself Com

Laying New Wood Flooring Over Original Uneven Floorboards Le Arthur Wells
Related Posts