Installing Luxury Vinyl Plank Flooring Over Linoleum: A Comprehensive Guide
Luxury vinyl plank (LVP) has gained immense popularity as a flooring option, owing to its durability, versatility, and cost-effectiveness. If you're considering installing LVP over existing linoleum, this guide will provide you with all the essential information and step-by-step instructions.
Compatibility Considerations
Before diving into the installation process, it's crucial to assess if your existing linoleum is compatible with LVP. Most linoleum surfaces are suitable, but there are a few exceptions to watch out for:
- Loose or Curling Linoleum: Replace loose or curling sections of linoleum prior to LVP installation.
- Inlaid Linoleum: LVP cannot be installed over inlaid or rotogravure linoleum due to its uneven surface.
- Damaged Linoleum: Severe damage or holes in the linoleum must be repaired or replaced before LVP installation.
- Clean Thoroughly: Remove dirt, dust, and debris using a vacuum cleaner and a damp mop.
- Remove Moldings: Remove any baseboards, molding, or transition strips.
- Smooth Unevenness: Fill any gaps or holes using a self-leveling compound. Use a sander to smooth out any high spots.
- Repair Damaged Linoleum: Repair small tears or cuts using a linoleum patch kit.
- Select Underlayment: Choose an underlayment specifically designed for LVP flooring.
- Roll Out Underlayment: Start in a corner and roll out the underlayment over the entire floor, overlapping the edges slightly.
- Secure Underlayment: Tape the seams of the underlayment together using duct tape or underlayment tape.
- Plan Layout: Determine the starting point and stagger the planks to create a natural look.
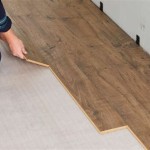
- Start Installation: Place the first plank into the corner and secure it with a locking mechanism or adhesive.
- Continue Laying Planks: Continue laying planks row by row, interlocking or adhering them together.
- Trim and Fit: Use a utility knife or a circular saw to trim planks to fit around walls and obstacles.
- Install Moldings: Reinstall baseboards, molding, and transition strips to finish the look.
- Allow for Expansion: Leave a small gap around the perimeter of the room to allow for floor expansion and contraction.
- Use a Sharp Blade: Use a sharp utility knife or circular saw to avoid chipping or breaking the planks.
- Follow Manufacturer Instructions: Carefully follow the manufacturer's guidelines for installation, adhesive, and underlayment.
- Acclimate Flooring: Allow the LVP flooring to acclimate to the room temperature for 24-48 hours before installation.
- Don't Rush: Take your time and ensure each plank is securely installed before moving on to the next.
Preparing the Linoleum Surface
Once you've established compatibility, prepare the linoleum surface for LVP installation:
Installing the Underlayment
An underlayment not only adds comfort but also helps absorb sound and reduce imperfections in the linoleum surface:
Installing the LVP Flooring
With the underlayment in place, you're ready to install the LVP flooring:
Tips for Success
Here are some valuable tips to ensure a successful LVP installation over linoleum:

How To Install Vinyl Plank Flooring As A Beginner Home Renovation

Upgrading Bathroom Add Vinyl Flooring To Linoleum Floor And Around Toilet

How To Install Luxury Vinyl Tile Over Linoleum Your Home Renewed

Can You Put Vinyl Plank Flooring Over Linoleum 2024 Today S Homeowner

A Beginner S Guide To Installing Vinyl Plank Flooring Dumpsters Com

Laying Vinyl Planks The Right Way Expert Guide By Fantastic Handyman

Installing Vinyl Plank Flooring How To Fixthisbuildthat

Can You Lay Tile Over Linoleum Rubi Blog Usa

Luxury Vinyl Tile And Plank Flooring Installation Costs

How To Install Vinyl Plank Flooring As A Beginner Home Renovation
Related Posts

