How To Install Pine Flooring On Concrete Slab
Installing pine flooring on a concrete slab can be a rewarding DIY project, adding warmth and character to your home. It requires careful preparation and execution to ensure a successful outcome. This article will guide you through the process, providing step-by-step instructions and helpful tips.
1. Prepare the Concrete Slab
A smooth and level concrete slab is essential for a successful pine flooring installation. The first step involves preparing the surface:
- Clean the slab: Remove all dirt, debris, dust, and any existing coatings using a vacuum cleaner, broom, and damp cloth. This ensures a clean and adhesive surface for the flooring.
- Repair any cracks or holes: Fill any cracks or holes in the concrete with a concrete patching compound. Allow the compound to cure completely before proceeding.
- Level the slab: If the slab is uneven, use a self-leveling concrete compound to create a smooth surface. Follow the manufacturer's instructions for application and curing time.
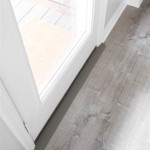
- Moisture barrier: Install a 6-mil polyethylene moisture barrier over the leveled concrete. This prevents moisture from the slab from damaging the wood flooring. Overlap the barrier seams by at least 6 inches and tape them securely.
2. Install the Subfloor
Installing a subfloor over the concrete slab provides a stable base for the pine flooring. There are two primary options:
- Plywood subfloor: Use 3/4-inch plywood sheets, ensuring they are properly acclimated to the environment. Lay the sheets perpendicular to the joists and secure them with screws or nails. Stagger the joints between sheets for added strength.
- Concrete backer board: This water-resistant material is specifically designed for concrete subfloors. It comes in various thicknesses and can be installed with adhesive and screws. Follow the manufacturer's instructions for installation.
The subfloor must be level and smooth for a successful pine flooring installation. Use a level and shims to adjust any discrepancies. If using plywood, ensure that the panels are tightly fitted and secured to prevent movement or squeaking.
3. Installing the Pine Flooring
Once the subfloor is prepared, you can start installing the pine flooring. There are two primary methods:
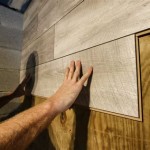
- Nail down method: This involves nailing the pine planks directly to the subfloor. Use a pneumatic nailer for faster and more efficient installation. Ensure that the nails are driven at a consistent depth and that the planks are tightly fitted against each other.
- Floating method: This involves installing the planks with a tongue-and-groove system without nailing them directly to the subfloor. The planks are connected together and allowed to float over the subfloor. This method is particularly suitable for rooms with uneven subfloors or those where noise reduction is desired. Use a tapping block to securely connect the planks.
Regardless of the method you choose, start installing the planks from a corner of the room. Ensure that the first plank is firmly in place and aligned with the wall. Maintain a consistent spacing between the planks, using spacers as needed. Work your way across the room, ensuring that each plank is tightly fitted and secured to the previous one. Use a finishing nailer to secure the planks to the subfloor, if needed.
4. Finishing Touches
After installing the pine flooring, it's time to complete the finishing touches:
- Sanding: Sand the entire floor to ensure a smooth and even surface. Start with coarse sandpaper and gradually progress to finer grits. Pay close attention to transitions between planks.
- Staining and sealing: Apply stain to the floor, if desired, to enhance its natural color or create a custom look. Follow the manufacturer's instructions for application and drying time. Once the stain is dry, apply a sealant to protect the wood from moisture and wear.
- Baseboards and trim: Install baseboards and trim around the perimeter of the room to complete the installation. Ensure that the baseboards are properly fitted and secured to the wall.
With the pine flooring installed and finished, you can enjoy a warm and inviting space. Remember to acclimate the wood flooring before installation, allowing it to adjust to the room's temperature and humidity. Keep in mind that maintaining the flooring involves regular cleaning and occasional refinishing to preserve its beauty and durability.

Installing Wood Flooring Over Concrete Diy

Installing Hardwood Floors On Concrete Subfloors

Installing Engineered Hardwood On Concrete Faqs Checklist

Tar And Screed Wood Floor Installation Hardwood Floors

Tongue Groove Flooring Installation On Underlay Start To Finish

Tar And Screed Wood Floor Installation Hardwood Floors

How To Install Vinyl Plank Flooring Tutorial For Beginners Home Reno
.jpg?strip=all "Laying A Rustic Pine Floor Ibuildit Ca")
Laying A Rustic Pine Floor Ibuildit Ca

Design Considerations For A Wide Plank Hickory Floor Carlisle Floors
.jpg?strip=all "Antique Wooden Floors Original Pine Floorboards")
Antique Wooden Floors Original Pine Floorboards
Related Posts