Installing Luxury Vinyl Plank Flooring On Concrete: A Comprehensive Guide
Luxury vinyl plank (LVP) flooring has gained immense popularity due to its durability, ease of maintenance, and stylish appearance. Installing LVP on concrete is a relatively straightforward process, but it requires careful preparation and attention to detail to ensure a flawless finish.
Before starting the installation, gather the necessary tools and materials, including LVP planks, spacers, a utility knife, a straight edge, a hammer or mallet, and an adhesive or underlayment.
Step 1: Prepare the Concrete Surface
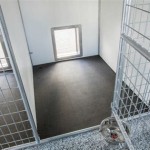
The concrete surface must be clean, dry, and level. Remove any existing flooring, debris, or adhesive. Use a concrete cleaner and a scrub brush to remove dirt and grease. Ensure the surface is completely dry before proceeding.
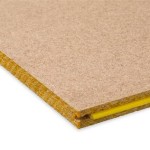
Step 2: Install Underlayment (Optional)
An underlayment can provide additional soundproofing, moisture protection, and cushioning under the LVP. If desired, roll out the underlayment over the concrete surface and secure it with tape or adhesive.
Step 3: Determine the Starting Point
Choose a starting point for the installation, typically a straight wall. Measure and mark a perpendicular line from the wall to serve as the first row guide.
Step 4: Install the First Row
Apply adhesive or underlayment to the concrete surface along the starting line. Align the first plank with the guide line and tap it into place with a hammer or mallet. Continue installing the first row, using spacers to ensure even gaps between the planks.
Step 5: Continue Installing Rows
For subsequent rows, stagger the end joints of the planks for added stability. Apply adhesive or underlayment and align each plank with the previous row. Tap it into place and remove the spacers once the row is complete.
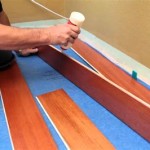
Step 6: Cuts and Transitions
Use a utility knife and a straight edge to make cuts for corners, doorways, or transitions. Measure and mark the cuts carefully to ensure a precise fit. Use transition strips or moldings to cover the joints where LVP meets other flooring types.
Step 7: Final Touches
Once all the planks are installed, remove the spacers and clean the floor with a damp mop. Allow the adhesive to cure for the recommended time specified by the manufacturer.
Installing LVP on concrete requires a bit of precision and attention to detail, but it is a manageable project for DIY enthusiasts. By following these steps carefully, you can create a durable and visually appealing LVP floor that will enhance the look and feel of your home.

Easy Ways To Install Vinyl Plank Flooring On Concrete

Tips For Installing Vinyl Plank Over Concrete Floors Lemon Thistle

Easy Ways To Install Vinyl Plank Flooring On Concrete

How To Prepare A Concrete Floor For Vinyl Flooring Parrys

Vinyl Plank Flooring On Uneven Concrete

How To Install Vinyl Plank Flooring As A Beginner Home Renovation

Tips For Installing Vinyl Plank Over Concrete Floors Lemon Thistle

10 Beginner Mistakes Installing Vinyl Plank Flooring

Easy Ways To Install Vinyl Plank Flooring On Concrete

How To Install Vinyl Flooring On Concrete Floor Ers
Related Posts