Essential Aspects of Installing Floating Engineered Flooring on Concrete
Installing floating engineered flooring on concrete can enhance the aesthetic appeal and functionality of your space. However, meticulous attention to essential aspects is crucial to ensure a successful installation. This guide will delve into the fundamental considerations and provide step-by-step instructions to guide you through the process.
Materials and Tools
Gather the necessary materials and tools before commencing the installation. These include:
- Floating engineered flooring
- Vapor barrier
- Underlayment
- Spacers
- Tapping block
- Pry bar
- Circular saw
- Tape measure
- Safety glasses
Concrete Preparation
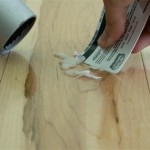
Ensure the concrete subfloor is clean, dry, and level. Remove any dirt, dust, or debris using a broom or vacuum cleaner. Check for unevenness or cracks and repair them as necessary using a patching compound. A moisture barrier, such as polyethylene sheeting, should be installed over the concrete to prevent moisture from seeping into the flooring.
Underlayment Installation
Roll out the underlayment over the moisture barrier, perpendicular to the direction of the flooring planks. Overlap the sheets by about 4 inches and secure them using tape. The underlayment provides cushioning and sound insulation, enhancing the comfort and durability of the flooring.
Plank Installation
Begin installing the planks from one corner of the room. Place spacers along the walls to maintain a uniform gap for expansion. Tap the first plank into place using a tapping block and hammer. Continue adding planks, aligning the tongue and groove edges and tapping them together firmly. Stagger the joints between the rows for increased stability.
Cutting and Fitting
Various cuts may be necessary to fit the flooring around obstacles or to complete the installation along walls. Use a circular saw to make precise cuts, ensuring that the cuts are perpendicular to the plank edges. Measure and cut the planks accordingly, allowing for the expansion gap.
Finishing Touches
Once all the planks are installed, remove the spacers and install baseboards or quarter rounds around the perimeter of the room. These moldings conceal the expansion gap and provide a finished look. Clean the floor thoroughly to remove any dust or debris, and enjoy the beauty and functionality of your newly installed floating engineered flooring.

Installing Wood Flooring Over Concrete Diy

Installing Engineered Hardwood On Concrete Twenty Oak

How To Install A Hardwood Floating Floor

Installing Engineered Hardwood On Concrete Villagio Guide

Which Method Should I Use To Install My Engineered Wood Floor Tesoro Woods

How To Install Lock Engineered Hardwood Flooring

Installing Engineered Hardwood On Concrete Twenty Oak

Direct Stuck Vs Floated Engineered Floors Whats Best For You

Flooring Fixing Methods Floating Floors Direct Wood Blog

Floating A Wood Floor Hardwood Floors
Related Posts


