Installing Engineered Flooring on Concrete
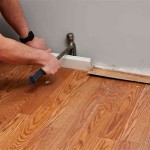
Engineered flooring is an attractive and durable option for flooring in various rooms of your home. Installing engineered flooring on concrete can be a rewarding project if you follow the correct steps and have the proper tools. ### Materials and Tools - Engineered flooring - Concrete floor preparation products (patching compound, grinder, primer, etc.) - Underlayment - Moisture barrier - Adhesive - Trowel - Level - Measuring tape - Safety glasses - Dust mask ### Step 1: Concrete Preparation - Ensure the concrete floor is level, clean, and free of debris. - Repair any cracks or holes with patching compound and allow it to dry completely. - Grind the concrete surface to remove any unevenness and create a smooth base. - Apply a concrete primer to seal the surface and improve adhesion. ### Step 2: Moisture Barrier - Install a moisture barrier over the concrete to prevent moisture from seeping into the flooring. - Overlap the barrier seams by at least 4 inches and tape them together with moisture-resistant tape. ### Step 3: Underlayment - Install an underlayment over the moisture barrier. This will provide cushioning, sound insulation, and additional moisture protection. - Roll out the underlayment and make sure it covers the entire floor area. - Secure the underlayment with tape or staples. ### Step 4: Adhesive Application - Choose an adhesive specifically designed for engineered flooring on concrete. - Using a trowel, apply a thin, even layer of adhesive to the subfloor. - Work in small sections at a time to prevent the adhesive from drying out. ### Step 5: Plank Installation - Start installing the engineered flooring planks along one wall. - Place the first plank in the corner and align it with the wall. - Apply adhesive to the edges of the plank and press it into place. - Continue installing planks row by row, applying adhesive to each plank and tapping them into place. - Use a level to ensure each row is straight and level. ### Step 6: Trimming and Finishing - Cut the last plank in each row to fit the space remaining. - Install baseboards or moldings around the perimeter of the room to hide the edges of the flooring and give it a finished look. ### Maintenance - Regularly sweep or vacuum the floor to remove dirt and debris. - Use a damp mop for regular cleaning. Avoid using harsh chemicals or excessive water. - Avoid walking on the floor with high heels or sharp objects that could damage the surface.
Installing Wood Flooring Over Concrete Diy

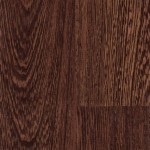
Installing Engineered Hardwood On Concrete Twenty Oak

Installing Engineered Hardwood On Concrete Twenty Oak

Installing Engineered Flooring On A Concrete Slab Fine Homebuilding

How To Install Engineered Flooring On Concrete Adm

How To Install Solid Wood Flooring On Concrete And Oak Specialists Suppliers Nexus

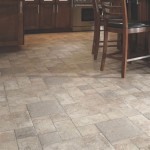
How Do I Install A Hardwood Floor On Concrete Slab The Carpet Guys

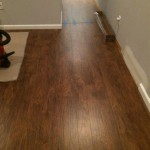
How To Install Engineered Wood Flooring On Concrete

Installing Engineered Hardwood On Concrete Villagio Guide

How To Install Engineered Wood Flooring On Concrete
Related Posts