How To Install Engineered Wood Flooring On Concrete Slab
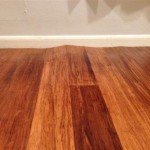
Engineered wood flooring offers a durable and aesthetically pleasing alternative to traditional hardwood. Its multi-layered construction provides enhanced stability, making it a suitable option for installation over concrete slabs. Properly preparing the concrete subfloor and understanding the installation process are critical for a successful and long-lasting result. This article outlines the steps involved in installing engineered wood flooring on a concrete slab, ensuring a professional and aesthetically pleasing outcome.
Before commencing any installation, gathering the necessary tools and materials is paramount. Essential tools include a moisture meter, a tapping block, a rubber mallet, a measuring tape, a circular saw or miter saw, a utility knife, spacers, a level, a straight edge, safety glasses, and knee pads. Material requirements comprise the engineered wood flooring itself, an appropriate underlayment specific for concrete, moisture barrier film (if required by the manufacturer), construction adhesive (if the installation method requires it), and shims.
Acclimation and Inspection
Acclimation is a crucial process that allows the engineered wood flooring to adjust to the ambient temperature and humidity levels of the installation environment. This process minimizes expansion and contraction after installation, preventing warping or gapping. The engineered wood flooring should be stored in the room where it will be installed for a minimum of 48 to 72 hours, ideally with the boxes opened to allow for proper air circulation. The room's temperature should be consistent with the temperature range within which the flooring will be subjected under normal conditions. Maintaining optimal temperature and humidity levels during and after installation is essential for the longevity of the floor.
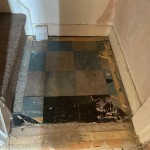
Prior to installation, a thorough inspection of both the engineered wood flooring and the concrete slab is crucial. Examine the flooring planks for any defects, damage, or inconsistencies in color or finish. Sorting the planks according to shade variation can lead to a more aesthetically pleasing final result. The concrete slab needs to be inspected for cracks, unevenness, and moisture content. Visible cracks should be repaired with a concrete patching compound. Significant unevenness will necessitate self-leveling compound to ensure a flat and even surface. Pay particular attention to areas near doorways, plumbing fixtures, and walls.
Addressing moisture concerns is paramount when installing engineered wood flooring over concrete. Concrete is porous and can transmit moisture from the ground. Excessive moisture can damage the engineered wood flooring, leading to warping, mold growth, and adhesive failure. The moisture content of the concrete should be tested using a moisture meter. The specific acceptable moisture level will depend on the flooring manufacturer's recommendations and the type of adhesive used. Common methods for testing moisture include calcium chloride tests and relative humidity probes. If the concrete exceeds the acceptable moisture level, a moisture barrier must be installed. This typically involves applying a liquid epoxy or a polyethylene film over the entire slab, following the manufacturer's instructions meticulously.
Subfloor Preparation
Proper subfloor preparation is fundamental to the success of any flooring installation. A clean, level, and dry concrete slab is an absolute necessity. Begin by thoroughly cleaning the concrete surface, removing any dirt, dust, debris, paint, adhesive residue, or other contaminants. Scraping, sweeping, and vacuuming are essential steps. Stubborn residue may require the use of a concrete scraper or a chemical solvent specifically designed for adhesive removal. Always follow the manufacturer's safety precautions when using chemical solvents, ensuring adequate ventilation and wearing appropriate protective gear.
Leveling the concrete slab is the next critical step. Use a long straight edge and a level to identify any high or low spots. Minor imperfections can often be addressed with a self-leveling compound. This liquid mixture is poured onto the concrete and allowed to spread and harden, creating a smooth and level surface. Follow the manufacturer's instructions for mixing and application carefully, as incorrect ratios or techniques can lead to cracking or unevenness. For larger dips or significant unevenness, multiple applications of self-leveling compound may be required. Allow the self-leveling compound to fully cure before proceeding with the installation.
Once the concrete slab is clean, level, and dry, the installation of an underlayment is typically required. An underlayment provides several benefits, including cushioning, sound absorption, and moisture resistance. It also helps to bridge minor imperfections that may remain in the concrete surface. Choose an underlayment specifically designed for use over concrete. Some underlayments include a built-in moisture barrier, while others may require a separate moisture barrier film to be installed underneath. Install the underlayment according to the manufacturer's instructions, ensuring that the seams are tightly butted together and taped securely.
Installation Techniques
There are several methods for installing engineered wood flooring over concrete, including floating, gluing, and sometimes, a combination of both. The choice of method depends on the specific type of flooring, the manufacturer's recommendations, and the prevailing environmental conditions. A floating floor involves locking the planks together without attaching them directly to the subfloor. This method allows for expansion and contraction due to changes in temperature and humidity. A glued-down installation involves applying adhesive directly to the concrete subfloor and then adhering the planks to the adhesive. This method provides a more stable and solid feel underfoot.
When installing a floating floor, begin by laying the first row of planks along the longest straight wall in the room, leaving an expansion gap of approximately ¼ to ⅜ inch between the planks and the wall. Use spacers to maintain a consistent expansion gap around the perimeter of the room. Connect the planks together using the tongue-and-groove system, tapping them gently with a tapping block and rubber mallet to ensure a tight and secure fit. Continue laying rows of planks, staggering the end joints to create a more visually appealing and structurally sound floor. Cut the last row of planks to fit, leaving the same expansion gap as before. Transition pieces, such as T-moldings or reducers, can be used to cover expansion gaps at doorways and where the flooring meets other types of flooring.
When installing a glued-down floor, apply adhesive to a small section of the concrete subfloor, following the manufacturer's instructions for the type of adhesive being used. Spread the adhesive evenly using a notched trowel. Place the engineered wood planks onto the adhesive, pressing them firmly into place. Use a tapping block and rubber mallet to ensure good contact between the planks and the adhesive. Work in small sections, cleaning up any excess adhesive immediately with a damp cloth. Allow the adhesive to fully cure according to the manufacturer's instructions before walking on the floor. Maintain the expansion gap around the perimeter of the room, as with a floating floor. A heavier roller can be used to press the planks into the adhesive during installation, if the adhesive has a longer open time.
Regardless of the installation method, cutting engineered wood flooring planks accurately is crucial for a professional-looking result. Use a circular saw or miter saw to cut the planks to the desired length and shape. A sharp blade will minimize splintering and tear-out. When cutting around doorways, pipes, or other obstructions, use a jigsaw to create the necessary cutouts. Always measure twice and cut once to avoid mistakes. Consider using a template to guide the jigsaw for complex cuts. Safety glasses and hearing protection should be worn when operating power tools.
Post-Installation Procedures
Once the installation is complete, remove all spacers and install baseboards or quarter-round molding around the perimeter of the room to cover the expansion gap. These moldings should be nailed or glued to the wall, not to the flooring itself. Install transition pieces at doorways and where the flooring meets other types of flooring. Clean the floor thoroughly to remove any dust, debris, or adhesive residue. Follow the manufacturer's instructions for cleaning and maintaining the flooring. Avoid using harsh chemicals or abrasive cleaners, as these can damage the finish. Use a damp mop and a pH-neutral cleaner specifically designed for engineered wood flooring.
Protect the flooring from scratches and dents by using felt pads under furniture legs. Avoid wearing shoes with high heels or cleats on the flooring. Place mats or rugs in high-traffic areas to protect the finish. Regularly sweep or vacuum the floor to remove dirt and debris. Addressing spills immediately is critical. Wipe up spills promptly to prevent staining or water damage. Engineered wood flooring is a durable and long-lasting flooring option, but proper care and maintenance are essential to ensure its beauty and longevity.

Installing Wood Flooring Over Concrete Diy

Installing Engineered Hardwood On Concrete Twenty Oak

Installing Engineered Hardwood On Concrete Twenty Oak

Installing Engineered Flooring On A Concrete Slab Fine Homebuilding

Hardwood Over Concrete Auten Wideplank Flooring

Installing Hardwood Floors On Concrete Subfloors

Q A Solid Wood Floors Over Concrete Slabs Jlc

Getting It Right Wood Flooring Over A Concrete Subfloor Page 2 Of 3 Construction Specifier

How To Install An Engineered Hardwood Floor

Ask Fred How Do I Install Wood Floor Below Grade Schedule
Related Posts