Flooring J Trim: An Essential Guide
When it comes to flooring, the finishing touches can make all the difference. One essential element of a well-finished floor is J trim, also known as floor transition trim. This trim serves several important purposes, both functional and aesthetic.
Purpose of Flooring J Trim
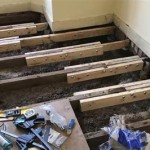
Expansion Gap Coverage: J trim is primarily used to cover the expansion gap between two different types of flooring or between flooring and a wall. As wood and other flooring materials expand and contract with changes in temperature and humidity, an expansion gap is necessary to prevent buckling and damage. J trim conceals this gap, providing a smooth and seamless transition between surfaces.
Protection from Moisture: In areas where there is potential for moisture, such as bathrooms and kitchens, J trim acts as a barrier to prevent water from seeping under the flooring. This helps to protect the flooring from water damage and mold growth.
Aesthetic Appeal: J trim not only serves functional purposes but also enhances the overall appearance of a room. It can create a polished and professional look by disguising gaps and edges, adding a touch of style and sophistication to any space.
Types of Flooring J Trim
There are various types of J trim available to suit different flooring materials and aesthetic preferences:
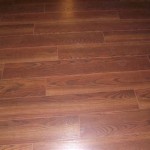
- Wood J Trim: Typically made from solid wood or engineered wood, this trim matches the color and texture of the flooring for a seamless transition.
- Vinyl J Trim: Designed for vinyl flooring, this trim provides a water-resistant and durable option.
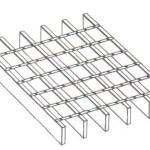
- Metal J Trim: Made from aluminum or stainless steel, this trim offers a modern and industrial look, suitable for both commercial and residential spaces.
- PVC J Trim: A versatile and affordable option, PVC trim is available in a wide range of colors and finishes.
Installation Tips
Installing flooring J trim is a straightforward process, but careful attention to detail is crucial for a professional finish:
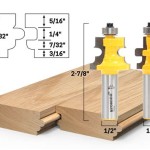
- Measure and Cut: Determine the length needed for each section of trim and cut it to size using a miter saw for precise angles.
- Apply Adhesive: Spread construction adhesive evenly along the back of the trim.
- Position and Secure: Place the trim in position and press firmly into the adhesive. Use a rubber mallet or a tapping block to gently tap it into place.
- Nail or Screw: For added stability, drive nails or screws through the trim and into the floor or wall.
- Caulk: Apply a thin bead of caulk along the edges of the trim where it meets the flooring or wall to seal any gaps and create a finished look.
Conclusion
Flooring J trim is an essential component of any well-finished flooring installation. It provides functional benefits such as expansion gap coverage, moisture protection, and aesthetic enhancement. By choosing the right type of trim and following proper installation techniques, homeowners and professionals can achieve a polished and professional-looking floor that will last for years to come.

J Trim Flooring At Com

J Trim Flooring At Com

Jolly Trim J Various Colours Bob S Floors

Pvc J Trim For Fluted Model Louver 2 9m X 0 16m Wood Color Exterior Replace To Wpc China Panel The Ceiling Made In Com

J Shaped Trim

J Trim Flooring At Com

10mm Flooring Profile Edge Trim Floorco

J Shaped Trim

Golden Oak Soffit Board Starter Trim J 5mt

Trims Molding Specifically For New Lvt Hardwood Features Floor Covering Weekly
Related Posts