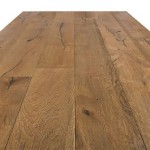
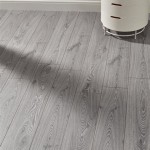
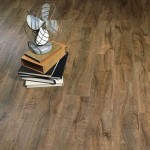
Wide Plank Flooring Installation Guide
Wide plank flooring adds a touch of elegance and sophistication to any home. With its wide planks and rich textures, it can instantly create a warm and inviting atmosphere. However, installing wide plank flooring can be a challenging task, especially for do-it-yourselfers. Here is a comprehensive guide to help you navigate the process:
1. Preparation: Before beginning the installation, it's crucial to prepare the subfloor. Ensure it's level, dry, and structurally sound. Leveling the subfloor will prevent creaking and other issues in the future. Additionally, remove any existing flooring, baseboards, and trim.
2. Moisture Control: Wide plank flooring is susceptible to moisture damage. Therefore, it's essential to install a moisture barrier between the subfloor and the flooring. This barrier will prevent moisture from seeping into the flooring and causing problems.
3. Underlayment: Installing an underlayment between the subfloor and the flooring is recommended. Underlayment provides additional cushioning, reduces noise, and can help with moisture control. Choose an underlayment specifically designed for wide plank flooring.
4. Acclimation: Before installing the flooring, it's important to acclimate it to the environment where it will be installed. This process allows the flooring to adjust to the temperature and humidity levels, reducing the risk of buckling or cupping.
5. Installation Method: Wide plank flooring can be installed using various methods, including nailing, stapling, or gluing. The recommended method will depend on the flooring type and subfloor. It's important to follow the manufacturer's instructions carefully to ensure a successful installation.
6. Expansion Gap: Allow for expansion gaps around the perimeter of the room and between sections of the flooring. These gaps will prevent the flooring from buckling as it expands and contracts due to changes in temperature and humidity.
7. Finishing: Once the flooring is installed, it's time to finish it. Sanding and buffing will remove any imperfections and create a smooth surface. Finally, apply a protective finish, such as a polyurethane or wax, to protect the flooring from wear and tear.
Additional Tips:
- Use a table saw or circular saw with a fine-tooth blade specifically designed for cutting hardwood flooring.
- Install a vapor barrier under the subfloor to prevent moisture from rising and damaging the flooring.
- Use a pneumatic nailer to secure the flooring to the subfloor. Hand-nailing can be challenging and may damage the flooring.
- Stagger the joints between adjacent planks to create a more natural look.
- Allow the flooring to cure for at least 24 hours before walking on it or placing furniture.
Installing wide plank flooring can be a rewarding experience, but it requires careful planning and precision. By following these steps and tips, you can achieve a stunning and durable wide plank floor that will enhance the beauty of your home for years to come.

Nwfa Installation Guidelines Carlisle Wide Plank Floors

A Beginner S Guide To Installing Vinyl Plank Flooring Dumpsters Com

How To Install Hardwood Flooring For Beginners

Engineered Wood Floor Laying Flooring Installation Method

The Ultimate Guide To Wide Plank Flooring Mayriver

A Guide To Engineered Wood Floors Carlisle Wide Plank

How To Install Vinyl Plank Flooring As A Beginner Home Renovation

A Detailed Guide To Wide Plank Flooring Wood Co Our Blogwood Blog

The Ultimate Guide To Wide Plank Flooring Mayriver

How To Install Vinyl Plank Flooring The Home Depot
Related Posts