Roppe Rubber Flooring Installation: A Comprehensive Guide
Roppe rubber flooring is a popular choice for commercial and residential spaces due to its durability, slip resistance, comfort underfoot, and aesthetic appeal. Its versatility makes it suitable for various applications, including schools, hospitals, offices, gyms, and even residential basements or kitchens. However, the long-term performance and appearance of Roppe rubber flooring are highly dependent on proper installation. This article provides a comprehensive guide to Roppe rubber flooring installation, covering crucial aspects from subfloor preparation to final finishing.
Subfloor Preparation: The Foundation for a Successful Installation
The most critical step in any flooring installation, including Roppe rubber flooring, is proper subfloor preparation. A stable, level, and clean subfloor is essential for ensuring the adhesive bonds correctly and the flooring lies flat and even. Any imperfections, moisture, or contaminants on the subfloor can compromise the integrity of the installation and lead to premature failure, such as bubbling, cracking, or adhesive breakdown.
The first step in subfloor preparation is to determine the type of subfloor. Common subfloor materials include concrete, wood, and existing resilient flooring. Each of these materials requires specific preparation methods to ensure a successful installation.
For concrete subfloors, several factors need to be considered. New concrete slabs must be fully cured, typically for at least 28 days, to allow excess moisture to evaporate. Moisture testing is crucial to determine the moisture vapor emission rate (MVER) or relative humidity (RH) within the slab. Roppe provides specific guidelines for acceptable MVER or RH levels, which vary depending on the adhesive used. Exceeding these limits can lead to adhesive failure and flooring delamination. Moisture mitigation systems may be required if moisture levels are too high. In addition, the concrete surface must be clean, free of debris, and structurally sound. Any cracks or imperfections should be repaired with a suitable patching compound. The concrete surface should also be properly profiled, typically by grinding or shot blasting, to create a porous surface that will allow the adhesive to bond effectively.
Wood subfloors must be equally sound and stable. Check for loose, rotted, or damaged boards and replace them as necessary. Ensure the wood subfloor is securely fastened to the joists. Unevenness can be addressed by sanding or using a self-leveling underlayment. The wood subfloor must be clean, dry, and free of any contaminants such as paint, varnish, or wax. Similar to concrete, wood subfloors should be tested for moisture content. Excessive moisture can lead to warping, buckling, and adhesive failure. Roppe recommends specific moisture content levels for wood subfloors prior to installation.
If installing Roppe rubber flooring over existing resilient flooring, careful assessment is required. The existing flooring must be well-bonded to the subfloor, clean, and free of any wax or polish. It's generally recommended to avoid installing over cushioned vinyl flooring, as the cushioning can compress over time and affect the stability of the new flooring. The existing flooring should be thoroughly cleaned and abraded to create a suitable surface for the adhesive.
Regardless of the subfloor type, thorough cleaning is essential. Vacuum the area to remove loose debris, then scrub the surface with a neutral cleaner to remove any dirt, grease, or oil. Rinse thoroughly with clean water and allow the subfloor to dry completely before proceeding with the installation.
Adhesive Selection and Application: Ensuring a Lasting Bond
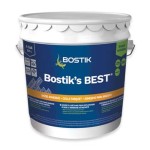
Choosing the correct adhesive and applying it properly are critical for achieving a durable and long-lasting Roppe rubber flooring installation. Roppe specifies particular adhesives that are compatible with their flooring products and the intended application. Using an unauthorized adhesive can void the warranty and potentially damage the flooring. Factors to consider when selecting an adhesive include the type of subfloor, the specific Roppe flooring product being installed, the presence of moisture, and the anticipated traffic load.
Roppe typically recommends two types of adhesives: wet-set adhesives and pressure-sensitive adhesives. Wet-set adhesives are applied to the subfloor and allowed to “wet-out” for a certain period before the flooring is installed. This type of adhesive provides a strong, permanent bond. Pressure-sensitive adhesives, also known as releasable adhesives, are applied to the subfloor and allowed to dry to a tacky consistency. The flooring is then installed, and the pressure applied during rolling activates the adhesive. Pressure-sensitive adhesives are often preferred for installations where future removal or replacement is anticipated.
The adhesive should be applied evenly and according to the manufacturer's instructions, using the recommended trowel notch size. Using the wrong trowel can result in too much or too little adhesive, leading to bonding problems. Pay close attention to the open time of the adhesive, which is the amount of time the adhesive remains workable after it is applied. Installing the flooring after the open time has expired can result in a weak bond.
When installing the flooring, carefully position each piece and press it firmly into the adhesive. Use a floor roller to ensure full contact between the flooring and the subfloor. Roll the flooring in both directions to remove any air pockets and ensure a strong bond. Follow the manufacturer’s recommendations for rolling weight and the number of passes required. Allow the adhesive to cure completely before allowing heavy traffic on the floor. The cure time can vary depending on the adhesive type and environmental conditions.
Proper ventilation is essential during adhesive application and curing. Follow all safety precautions and wear appropriate personal protective equipment, such as gloves and a respirator, as recommended by the adhesive manufacturer.
Installation Techniques: Achieving a Professional Finish
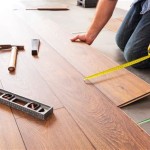
The actual installation process involves several key steps, from acclimating the flooring to the environment to properly cutting and fitting the material. Attention to detail is vital to achieving a seamless and professional-looking finish.
Before installation, acclimate the Roppe rubber flooring to the room temperature for at least 48 hours. This allows the flooring to expand or contract, preventing issues such as buckling or gapping after installation. Store the flooring in the room where it will be installed, ensuring it is lying flat and protected from direct sunlight or extreme temperatures.
Plan the layout of the flooring before beginning the installation. Consider the direction of the flooring, the placement of seams, and any potential waste. If using multiple rolls or tiles, ensure they are from the same dye lot to minimize color variations. Dry-lay the flooring to ensure a proper fit and identify any areas that need to be adjusted. This allows for fine-tuning before the adhesive is applied.
When cutting the flooring, use a sharp utility knife and a straight edge. Make precise cuts to ensure tight seams. For intricate cuts around corners or pipes, use a template to ensure accuracy. Overlap adjacent pieces slightly and use a seam roller to create a tight, seamless joint. When installing cove base, use the appropriate adhesive and follow the manufacturer's instructions for proper installation. Ensure the cove base is securely bonded to both the floor and the wall to create a watertight seal.
After the flooring is installed, remove any excess adhesive from the surface with a damp cloth. Inspect the flooring for any imperfections or gaps. Use a seam sealer to seal any seams or edges that may be vulnerable to moisture penetration. Allow the adhesive to cure completely before allowing heavy traffic on the floor. Protect the newly installed flooring with cardboard or plywood if necessary. Regular cleaning and maintenance are essential for preserving the appearance and longevity of Roppe rubber flooring.

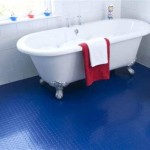
Rubber And Vinyl Flooring Roppe

Rubber Tread Roppe

Rubber Tile Roppe

Roppe Raised Design Rubber Tile

Roppe Dimensions Rubber Tile Designer Floor Tiles

Roppe Launches Rubber Stair Treads With Dupont Kevlar 2024 01 28 Floor Trends Installation

Roppe Rubber Flooring Continental Company

General Maintenance For Roppe Envire Rubber Sheet Tile Rhc Technical S

Roppe Raised Design Rubber Tile

Roppe Rubber Flooring Continental Company
Related Posts