Allen + Roth Laminate Flooring Installation Guide: Step-by-Step Instructions
Installing laminate flooring can be a rewarding DIY project, especially with the help of Allen + Roth's user-friendly installation guide. This guide provides comprehensive instructions to ensure a flawless and durable installation. Here are the essential aspects you need to know:
1. Preparation and Planning
Before starting the installation, it's crucial to prepare the subfloor by ensuring it is level and free of moisture. Plan the layout of the flooring to minimize cuts and optimize the appearance. Allow the flooring to acclimate to the room temperature for at least 48 hours before installation to prevent warping.
2. Underlayment Installation
Underlayment provides sound absorption, moisture protection, and a smooth base for the flooring. Roll out the underlayment over the subfloor and secure it with tape at the seams. Ensure the underlayment is flat and free of creases or bubbles.
3. First Row Installation
Begin the flooring installation by placing the first row of planks along the longest wall in the room. Use spacers to maintain an expansion gap around the edges. Interlock the planks using the tongue-and-groove system, ensuring they are secured tightly together.
4. Subsequent Row Installation
Continue installing subsequent rows by angling the planks at a 20-30 degree angle and inserting the tongue into the groove of the previous row. Use a tapping block and a hammer or flooring mallet to gently tap the planks into place. Always check the tightness of the joints.
5. Cutting and Fitting
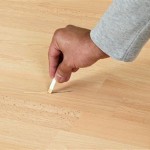
When installing around obstacles or reaching the end of a row, cutting the planks is necessary. Use a laminate cutter or a fine-toothed saw to make precise cuts. Remember to account for the expansion gap when measuring and cutting.
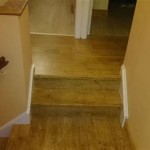
6. Transitions and Moldings
Transitions and moldings add a finished touch to the flooring. Install transition strips where the flooring meets other flooring types or changes in elevation. Use moldings around the perimeter to cover the expansion gap and enhance the aesthetic appeal.
7. Final Inspection and Maintenance
Once the installation is complete, inspect the flooring for any gaps, loose planks, or damage. Sweep or vacuum the flooring regularly to remove dirt and debris. Use a damp cloth for deep cleaning, avoiding excessive moisture that can damage the flooring.
Conclusion
Installing Allen + Roth laminate flooring can be an achievable DIY task with careful preparation and the guidance of the installation guide. By following these essential aspects, you can create a beautiful and durable flooring that will enhance the aesthetics and functionality of your home.

How To Install Laminate Flooring Easy Step By Instructions

How To Install Laminate Flooring The Home Depot

How To Install A Laminate Floor

How To Install Laminate Flooring For Beginners

How To Install A Laminate Floor

How To Install Laminate Flooring

How To Install A Laminate Floor

How To Install Laminate Flooring Easy Step By Instructions

How To Install Laminate Flooring For Beginners

How To Install Laminate Flooring
Related Posts