Changing the Direction of Wood Flooring: Essential Aspects
Changing the direction of wood flooring can significantly alter the aesthetic and functionality of a space. Whether you're seeking a dramatic shift or a subtle enhancement, understanding the essential aspects of this process is crucial.
Planning and Considerations
Before undertaking any flooring changes, it is essential to carefully plan and consider the following factors:
- Existing Flooring: Determine the type, size, and condition of the existing flooring to assess compatibility and installation requirements.
- Subfloor: Ensure that the subfloor is stable, level, and free from moisture issues that could affect the new flooring.
- Desired Direction: Decide on the new direction for the flooring, considering factors such as natural light, traffic patterns, and visual appeal.
Installation Techniques
The installation technique used for changing the direction of wood flooring depends on the type of flooring and subfloor.
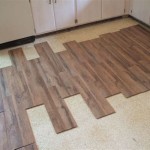
- Floating Floor: This type of flooring is installed unattached to the subfloor, using a click-lock or tongue-and-groove system. Changing the direction is relatively straightforward by disassembling and reassembling the planks.
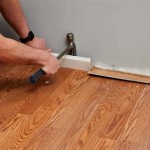
- Nail-Down: As the name suggests, these planks are nailed into the subfloor. Changing the direction requires careful removal and reinstallation, ensuring the planks are securely fastened.
- Glue-Down: Glue-down flooring requires adhesives to bond it to the subfloor. Changing the direction is a more complex process that involves scraping and removing the adhesive before reinstalling the planks.
Transitioning and Thresholds
When changing the direction of wood flooring, transitions are necessary to smoothly connect different areas or flooring types.
- T-Molding: Used to transition between two parallel sections of flooring with varying heights.
- Reducer: Transitions between a higher and a lower floor surface, such as from a bedroom to a hallway.
- Threshold: Similar to a reducer but provides a more visible boundary between different flooring materials, typically used at doorways.
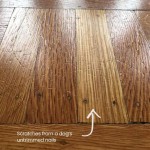
Maintenance and Refinishing
Once the new direction of the flooring is installed, proper maintenance is crucial to preserve its beauty and longevity.
- Regular Cleaning: Sweeping or vacuuming regularly helps remove dirt and dust.
- Mop with Caution: Avoid excessive water when mopping to prevent damage.
- Refinishing: Over time, wood flooring may require refinishing to restore its original luster and protect it from wear and tear.
Conclusion
Changing the direction of wood flooring can transform the character of a room while enhancing its functionality. Careful planning, selecting the appropriate installation technique, and incorporating seamless transitions are essential for a successful project. By adhering to these principles, you can achieve a stunning and durable flooring that adds value and aesthetic appeal to your home.

Floor Transition Ideas Expert Advice Craftedforlife

Hardwood Laying Direction

Which Direction Do You Install Hardwood Floors Nufloors

Changing Direction Of Wood Flooring Living Room Hardwood Floors In Kitchen House

Wall Of Shame A Funny Change Direction Wood Floor Business

Pre Finished Hardwood Flooring Custom Direction Change Roswell Ga

Laminate Flooring Direction Cut Diy Home Improvement Forum

Which Direction To Lay Your Hardwood Flooring Riterug

Which Direction Should The Floor Be Laid Real Wood Floors

Wood Direction Change In Hallway Hardwood Floors Flooring
Related Posts