Using Vinyl Flooring on Bathroom Walls: A Comprehensive Guide
Vinyl flooring, traditionally used as a surface covering for floors, is increasingly being considered as an alternative wall covering, particularly in bathrooms. This shift is driven by a combination of factors, including the material's inherent water resistance, durability, ease of maintenance, and design versatility. This article provides a detailed examination of using vinyl flooring on bathroom walls, covering its advantages, disadvantages, installation methods, and considerations for achieving a successful and aesthetically pleasing result.
The bathroom environment presents unique challenges for surface materials. High humidity levels, frequent water exposure, and the potential for mold and mildew growth necessitate the use of materials that can withstand these conditions. Traditional options like paint can be susceptible to moisture damage, requiring regular maintenance and potential repainting. Ceramic tile, while durable and water-resistant, can be expensive and time-consuming to install. Vinyl flooring offers a potential middle ground, providing a cost-effective and relatively easy-to-install solution with excellent water resistance.
Key Point 1: Advantages of Vinyl Flooring on Bathroom Walls
The appeal of using vinyl flooring on bathroom walls stems from a variety of beneficial properties. Understanding these advantages is crucial for evaluating whether this material is suitable for a specific bathroom project.
Water Resistance: Vinyl is inherently waterproof, making it an ideal choice for bathrooms where moisture exposure is unavoidable. Unlike materials that can absorb water and lead to swelling, warping, or mold growth, vinyl remains impervious to water penetration. This is particularly beneficial in shower areas or around bathtubs, where constant water exposure is expected.
Durability: Vinyl flooring is designed to withstand heavy foot traffic, and this durability translates well to wall applications. It resists scratches, dents, and impacts, ensuring that the walls maintain their aesthetic appeal over time. This is particularly advantageous in high-traffic bathrooms or those used by children.
Ease of Maintenance: Cleaning vinyl walls is straightforward. A simple wipe down with a damp cloth or mild detergent is typically sufficient to remove dirt, stains, and splashes. This ease of cleaning helps to maintain a hygienic environment and reduces the time and effort required for bathroom upkeep.
Design Versatility: Vinyl flooring is available in a wide array of colors, patterns, and textures. This allows for extensive design flexibility, enabling homeowners to create a bathroom that reflects their personal style. Vinyl can mimic the look of natural stone, wood, or tile, often at a significantly lower cost. Some vinyl flooring even features embossed textures, adding an extra layer of realism and visual interest.
Cost-Effectiveness: Compared to traditional wall coverings like ceramic tile or natural stone, vinyl flooring is generally more affordable. This cost difference can be significant, particularly for larger bathrooms or renovations involving multiple bathrooms. The lower material cost, coupled with the potential for DIY installation, makes vinyl an attractive option for budget-conscious homeowners.
Ease of Installation: While professional installation is always recommended for optimal results, vinyl flooring can be installed by experienced DIYers. Various installation methods, such as glue-down or click-lock systems, offer different levels of complexity, allowing homeowners to choose the option that best suits their skill level. The relative ease of installation can save on labor costs and reduce the overall project timeline.
Key Point 2: Disadvantages and Considerations
While vinyl flooring offers numerous advantages as a bathroom wall covering, it's essential to acknowledge potential drawbacks and considerations to ensure a satisfactory outcome.
Potential for Mold Growth Behind the Vinyl: While vinyl itself is waterproof, water can still seep behind the material if the installation is not properly sealed. This can create a breeding ground for mold and mildew, which can be difficult to detect and remediate. Proper sealing of seams and edges is crucial to prevent water penetration.
Limited Breathability: Vinyl is a non-breathable material, which means that it can trap moisture behind it. This can be problematic in bathrooms with poor ventilation, as it can contribute to the growth of mold and mildew. Adequate ventilation is essential to mitigate this risk.
Professional Installation Recommended for Complex Areas: While DIY installation is possible, achieving a professional-looking finish around corners, fixtures, and other complex areas requires skill and experience. Imperfect cuts or improperly sealed seams can detract from the overall aesthetic and compromise the material's water resistance.
Potential for Off-Gassing: Some vinyl flooring products may emit volatile organic compounds (VOCs), particularly when new. While most modern vinyl flooring is manufactured to meet low-VOC standards, it's advisable to choose products that are certified by reputable organizations, such as FloorScore, to minimize potential health concerns. Proper ventilation during and after installation can also help to reduce VOC levels.
Seam Visibility: Depending on the type of vinyl flooring used and the installation method, seams may be visible, particularly in larger areas. Choosing vinyl with a textured surface or opting for wider planks can help to minimize the appearance of seams. Careful seam placement is also crucial for achieving a seamless look.
Substrate Preparation is Critical: Like any wall covering, the success of vinyl flooring depends on proper substrate preparation. The wall surface must be clean, dry, smooth, and free of any imperfections. Any existing damage, such as cracks or holes, must be repaired before installation. Failure to properly prepare the substrate can result in an uneven surface and compromised adhesion.
Key Point 3: Installation Methods and Best Practices
The installation method for vinyl flooring on bathroom walls will depend on the type of vinyl flooring chosen and the desired aesthetic. Two common methods are glue-down and click-lock systems.
Glue-Down Installation: This method involves applying adhesive directly to the wall surface and then pressing the vinyl flooring into place. Glue-down installation provides a strong and permanent bond, making it suitable for areas with high moisture exposure. It's crucial to use an adhesive specifically designed for vinyl flooring and to follow the manufacturer's instructions carefully. Proper ventilation is also important during and after installation to allow the adhesive to dry and cure properly.
Click-Lock Installation: This method utilizes a tongue-and-groove system to interlock the vinyl planks or tiles. Click-lock installation is typically easier than glue-down installation, making it a popular choice for DIYers. However, it's essential to ensure that the seams are properly sealed to prevent water penetration. This can be achieved by applying a waterproof sealant to the edges of the planks or tiles.
Essential Installation Best Practices: Regardless of the installation method chosen, adhering to best practices is crucial for achieving a successful and long-lasting result.
Accurate Measurements: Precise measurements are essential to ensure that the vinyl flooring fits properly and that there is minimal waste. Use a measuring tape and a straight edge to accurately measure the wall area and to cut the vinyl to size.
Proper Cutting Techniques: Use a sharp utility knife or a vinyl flooring cutter to make clean and precise cuts. Dull blades can tear the vinyl and result in ragged edges. For intricate cuts around fixtures or corners, use a template to ensure accuracy.
Seam Placement: Carefully plan the placement of seams to minimize their visibility. Avoid placing seams in areas that are subject to high water exposure. Stagger seams to create a more visually appealing and seamless look.
Sealing Seams and Edges: Properly sealing seams and edges is crucial to prevent water penetration and to ensure the long-term performance of the vinyl flooring. Use a waterproof sealant specifically designed for vinyl flooring and apply it generously to all seams and edges.
Proper Ventilation: Ensure adequate ventilation during and after installation to allow the adhesive to dry and cure properly and to reduce VOC levels. Open windows and doors or use a fan to circulate air.
Regular Maintenance: Clean vinyl walls regularly with a damp cloth or mild detergent to remove dirt, stains, and splashes. Avoid using abrasive cleaners or scouring pads, as these can scratch the vinyl surface. Promptly address any water leaks or spills to prevent water damage. By following these installation methods and best practices, homeowners can successfully use vinyl flooring on bathroom walls to create a durable, water-resistant, and aesthetically pleasing space.

Can You Use Vinyl Flooring On Bathroom Walls Rustic Remodel Lighting Diy

Vinyl Floor On The Wall Turn 90 Degrees Choose Diffe Way Live Flooring Bathroom Tile Plank

Installing Waterproof Vinyl Flooring On Shower Walls Bathroom Design Inspiration Wall

Installed Vinyl Plank Flooring On My Bathroom Wall Love The Texture Color Walls

Best Bathroom Flooring Options

Bathroom Toilet Area Vinyl Laminate Wood Plank Wall And Floor Flooring

Bathroom Shower Vinyl Wall Panel Vs Tiles Which One Should You Choose Step Guard Floors

Bathroom Flooring Vinyl Multipanel

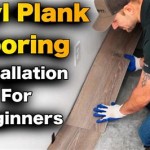
How To Install Vinyl Plank Flooring In A Bathroom Fixthisbuildthat

Vinyl Planks In Bathrooms Residential Inspiration Flooring
Related Posts