Installing Linoleum Flooring In Basement: A Comprehensive Guide
Basements often present unique flooring challenges due to their susceptibility to moisture and temperature fluctuations. Selecting the right flooring material is crucial for longevity and comfort. Linoleum, a resilient and eco-friendly flooring option, can be a suitable choice for basement installations when proper preparation and installation techniques are employed. This article provides a comprehensive guide to installing linoleum flooring in a basement, covering essential aspects from subfloor preparation to the final finishing touches.
Before embarking on the installation process, a thorough assessment of the basement environment is paramount. Moisture levels, existing subfloor condition, and potential sources of water intrusion must be addressed to ensure a successful and durable linoleum floor. Ignoring these factors can lead to premature failure of the flooring and necessitate costly repairs.
Subfloor Preparation: The Foundation for Success
The subfloor is the foundation upon which the linoleum flooring will rest. Its condition directly affects the performance and appearance of the finished floor. Proper preparation involves cleaning, leveling, and, if necessary, repairing or replacing damaged sections. A clean, flat, and dry subfloor is essential for achieving a smooth and aesthetically pleasing linoleum installation.
Begin by thoroughly cleaning the existing subfloor. Remove all debris, including dust, dirt, nails, staples, and any remnants of previous flooring materials. A shop vacuum is effective for removing loose particles, while a scraper can be used to dislodge stubborn adhesives or debris. Following the vacuuming, mopping the subfloor with a mild detergent solution is advisable to remove any remaining surface contaminants. Ensure the subfloor is completely dry before proceeding to the next step.
Leveling the subfloor is crucial, particularly in basements where unevenness is common. Use a long straightedge and a level to identify high and low spots. Minor imperfections can often be corrected using a self-leveling compound. This compound is poured onto the subfloor and allowed to spread and harden, creating a smooth and level surface. Follow the manufacturer's instructions carefully when applying self-leveling compound, paying attention to the recommended thickness and drying time.
For larger imperfections or significant unevenness, underlayment may be necessary. Underlayment panels provide a stable and level surface for the linoleum flooring. Plywood or cement board are common underlayment options. When selecting underlayment, ensure it is suitable for basement environments and resistant to moisture. Install the underlayment according to the manufacturer's instructions, using appropriate fasteners to secure it to the subfloor.
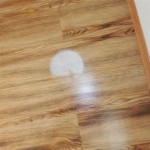
Addressing moisture is a critical step in subfloor preparation for basement linoleum installation. Basements are prone to moisture infiltration, which can damage the flooring and promote mold growth. Before installing linoleum, it is essential to identify and rectify any sources of moisture. This may involve addressing leaks, improving drainage, or installing a vapor barrier.
A vapor barrier is a waterproof membrane that prevents moisture from migrating through the subfloor and damaging the linoleum. It is typically installed directly over the subfloor before the underlayment (if used) or before the linoleum itself. Overlap the edges of the vapor barrier sheets by several inches and tape them securely to create a continuous moisture barrier. The type of vapor barrier to use depends on the specific conditions of the basement and the manufacturer's recommendations for the linoleum flooring.
Linoleum Selection and Acclimation
Choosing the right type of linoleum flooring is crucial for a successful basement installation. While sheet linoleum offers a seamless appearance and better moisture resistance, linoleum tiles or planks are easier to install and replace. Evaluate the pros and cons of each type based on the specific needs and preferences of the project.
Sheet linoleum is manufactured in large rolls, allowing for fewer seams and a more watertight installation. This makes it a suitable choice for basements where moisture is a concern. However, installing sheet linoleum requires specialized tools and skills. It is often best left to professional installers.
Linoleum tiles and planks are available in various sizes and designs. They are typically easier to install than sheet linoleum, making them a popular choice for DIY projects. However, the seams between tiles or planks can be more susceptible to moisture infiltration. Properly sealing the seams is essential to prevent water damage.
Regardless of the type of linoleum selected, proper acclimation is necessary before installation. Acclimation allows the linoleum to adjust to the temperature and humidity conditions of the basement. This helps prevent expansion and contraction after installation, which can lead to warping or buckling.
Store the linoleum rolls or cartons in the basement for at least 48 to 72 hours before installation. Ensure the basement is at a consistent temperature and humidity level during this period. Refer to the manufacturer's instructions for specific acclimation recommendations.
Installation Techniques and Best Practices
The installation process varies depending on whether you are installing sheet linoleum, tiles, or planks. However, some general principles apply to all types of linoleum installation. These include precise measurements, careful cutting, proper adhesive application, and secure fastening.
Begin by taking accurate measurements of the basement floor. Create a detailed floor plan, noting any irregularities or obstructions. Use this plan to determine the amount of linoleum needed and to plan the layout of the flooring.
When cutting linoleum, use a sharp utility knife or linoleum knife. Make precise cuts along the marked lines. For sheet linoleum, use a straightedge to ensure straight and accurate cuts. Consider using a seam roller to properly seal the seams and create a watertight bond.
Adhesive is used to bond the linoleum to the subfloor. Select an adhesive specifically designed for linoleum flooring and suitable for basement environments. Apply the adhesive evenly to the subfloor, following the manufacturer's instructions. Allow the adhesive to "flash off" or become tacky before installing the linoleum. This ensures a strong and durable bond.
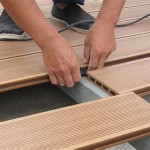
When installing linoleum tiles or planks, start in one corner of the room and work your way across. Use spacers to maintain consistent spacing between the tiles or planks. Once the adhesive has cured, remove the spacers and fill the gaps with grout or sealant. This helps to protect the seams from moisture infiltration.
For sheet linoleum, unroll the sheet and carefully position it over the prepared subfloor. Use a roller to smooth out any air bubbles and ensure good contact between the linoleum and the adhesive. Trim the edges of the sheet to fit the perimeter of the room. Properly seal the seams using a seam sealer recommended by the linoleum manufacturer.
After the linoleum is installed, use a floor roller to press it firmly against the subfloor. This ensures a strong bond and helps to eliminate any air pockets. Allow the adhesive to fully cure before walking on the floor. Refer to the manufacturer's instructions for the recommended curing time.
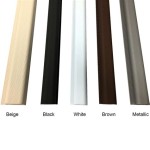
Once the adhesive is fully cured, install baseboards or molding along the perimeter of the room to cover the edges of the linoleum and create a finished look. This also helps to protect the walls from moisture damage. Carefully nail or glue the baseboards or molding to the wall studs, ensuring they are securely fastened.
Proper ventilation during and after installation is crucial. Open windows and doors to allow fresh air to circulate. This helps to dissipate the adhesive fumes and promote faster drying. If necessary, use a fan to increase airflow. Avoid exposing the newly installed linoleum to excessive heat or direct sunlight during the curing process.
After installation, it's crucial to properly maintain the linoleum flooring to ensure its longevity. Regular cleaning with a damp mop and neutral pH cleaner is essential. Avoid harsh chemicals or abrasive cleaners, as these can damage the surface of the linoleum. Promptly clean up any spills to prevent staining. Consider applying a protective sealant or wax to the linoleum to enhance its durability and resistance to scratches and stains.

How To Install Vinyl Or Laminate Floors In A Basement Over Concrete Slab

How To Install Vinyl Or Laminate Floors In A Basement Over Concrete Slab

Best How To Install Vinyl Plank Flooring Four Generations One Roof

Installing Luxury Vinyl Plank Flooring In Our Basement Week 5 Of The One Room Challenge Willow Bloom Home

Vinyl Flooring Install Do It Yourself Home With Krissy

Laminate Flooring On Concrete Basement Floors Expert Installation Guide Csg Renovation

Vinyl Flooring Around Floor Drain Installation Tips And Tricks 1 800 Remodel

Tips For Installing Vinyl Plank Over Concrete Floors Lemon Thistle

Installing Vinyl Floors A Do It Yourself Guide The Honeycomb Home

Best How To Install Vinyl Plank Flooring Four Generations One Roof